
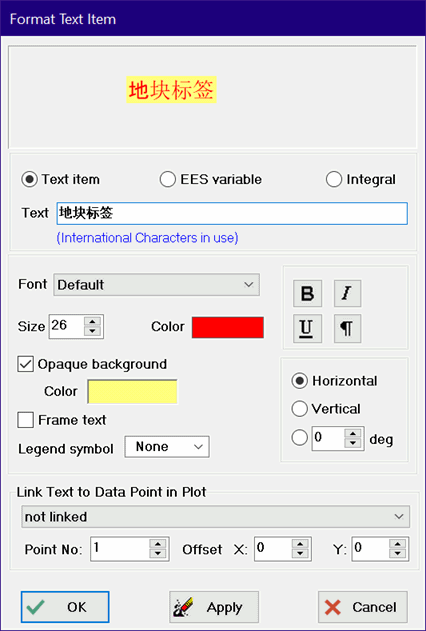
Add or Modify Plot Window Text
The Format Text dialog window appears when the text button on the plot tool bar is clicked, or when the left mouse button is double-clicked or the right mouse button is clicked when the cursor is positioned on an existing text item in the Plot Window. The dialog window contains fields that allow the text and its appearance to be changed. Both ASCII and International characters can be used in the text. Controls are provided to change the font, size, color and style of the text item as well as for individual characters within the text itself. A single text item can provide multiple lines of text and bold, italic, underline, superscript and subscript styles can be added to selected sections of the text.
The text can be of three types. The choice is controlled by the 'Text item', 'EES variable' and 'Integral' radio buttons. If 'Text item' is selected, an edit box is provided to enter text. Subscripts, superscripts, styles, symbols, and other enhancements to the text can be made as described below. If 'EES variable' is selected, the text is composed of information about an existing EES variable that includes the EES variable name, the formatted value of the variable, and its units. The text item will include the EES variable name and its units if the 'Show Name' and 'Show Units' check boxes are respectively selected. The 'Auto Update' check box controls whether or not the text item is automatically changed if the value of the variable or its units is later changed. If you do no wish this to occur, make sure that the 'Auto Update. check box is not selected. If the Integral button is selected, EES will create a text item displaying the numerical value of the integral of a selected line on the plot. If Auto Update is selected for the plot and the values being plotted change, the integral will also change accordingly.
When the 'Text Item' radio button is selected, text can be directly entered into the text edit box from the keyboard or by pasting from the clipboard. EES will automatically detect if the entered text contains international characters. If so, a blue (International Characters in use) message will appear under the text, as shown on the right in the figure below. The subscript, superscript, and symbol buttons are disabled when international characters are used.


The font, font color, font size, font style (Bold, Italic, Underline), line breaks, and subscripts and superscripts can be generated using the 'speed' buttons in the palette located to the right of the font name. First, select the text which for which the change is to be applied. Then click the appropriate control (Font, Size, Color) or button for Bold, Italic, Subscript, Underline, New Line, or Superscript. If a change is made to size, click outside of the Size box to register the change so that it can be viewed at the top of the dialog window. When the New Line button is clicked, a check box will appear below the text input field to allow the top two lines to be centered with respect to each other (if international characters are not in use.)
To illustrate, suppose you wish to enter "Length in m3", where the 3 is a superscript. Enter the text and select the 3, as shown on the left. The click the superscript button. The appearance that the text will have when it is displayed in the Plot window is shown at the top of the dialog.
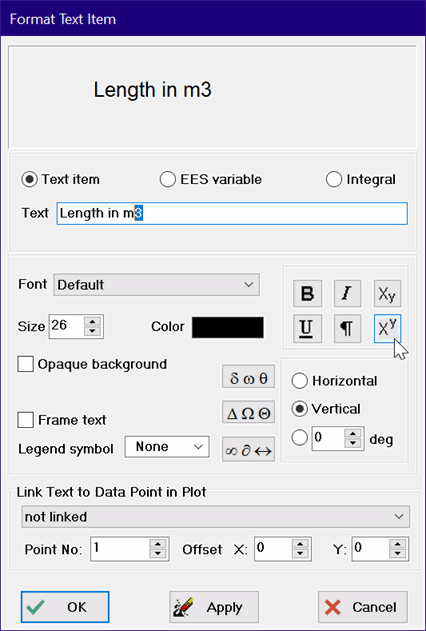

Note that EES embeds characters in the text to identify the formatting change for individual characters. The format characters can be directly entered from the keyboard and are defined as follows:
\b start or stop bold styling
\d start subscript
\i start or stop italic styling
\m start new line
\n start normal font (ends symbol font); end subscript or superscript
\s start symbol font
\u start superscript
\- start or stop underline styling
\fsxx set font size to xx for the following characters
\fnx set the font to the xth item in the Font drop down list for following characters
\fcxx set the font color to the xxth item in the Color drop down list for following characters
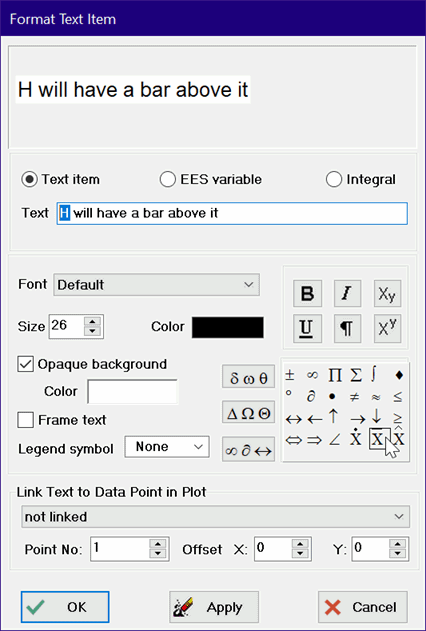
Three additional buttons are provided to facilitate entry of lower or upper case Greek letters and useful symbols. (These buttons are not available when International characters are in use.) The symbol entry buttons operate as follows. Press and hold the mouse button down on one of the three symbol buttons. A palette of symbols will be displayed to the right of the button. While holding the mouse button depressed, slide the mouse cursor to the symbol palette and position it over the symbol you wish to select. When the mouse button is released, that symbol will be added to the text item at the current insertion point. To place a dot, bar, or hat over a character or group of characters, first select the text in the Text box to which the formatting is to be applied; then press and hold the third symbol button while sliding the mouse to the X_dot, X_bar or X_hat symbol, as shown below. The text is displayed as it will appear in the large window at the top of the dialog.

A legend symbol can be associated with horizontal text by selecting the plot in the legend menu. The legend symbol is automatically drawn to the left of the text. The legend symbol moves with the text.
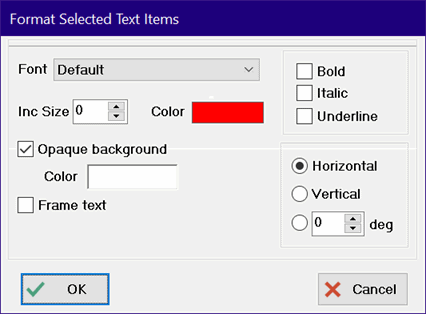
Clicking on a text item in the Plot Window when the Plot toolbar is visible will cause it to be drawn inside of a red dotted box indicating that it is selected. Multiple text items can be selected by holding the Shift key down as you click on each item or by using a selection rectangle. Double-clicking the left mouse button (or clicking the right mouse button) will cause the Format Text dialog window to appear in which the characteristics (such as font, size, style and color) of all selected text items can be changed at one time. Note that if multiple text items are selected, the incremental size is entered, rather than the actual size and the increment is applied to all selected text items.
Also, if more than one text item is selected, the align button on the Plot tool bar will be enabled. Clicking this button allows alignment of selected text items relative to each other.
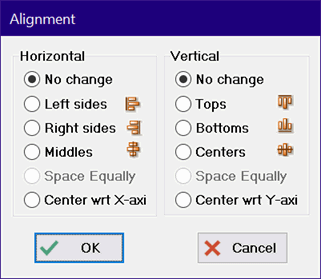
Selected text items can be copied to the Clipboard using the Cut and Copy commands in the Edit menu. The Delete key will cut all selected text items. Once on the Clipboard, the Paste command can be applied to move the text item from the Clipboard to any EES Plot Window.
The Professional license of EES will also show the following information in the Format Text Item dialog.

These controls can be used to position a text item relative to data point in a selected plot. If the data change and Automatic Update is selected for the plot, the text item will move with the data. This option is particularly convenient when plotting arrays. Selecting Show Array Indices in the New Plot Setup or Overlay Plot dialogs will automatically generate a text item for each plotted array point containing the number of the data point for identification.
Note that the text item is initially placed just to the upper right of the data point. However, the text item can be moved to a different location by clicking on it to select it and then dragging it with the mouse or using the arrow keys. Alternatively, the X and Y offset values (in pixels) can be set. (These offset values are referenced to the default value that EES uses when it first places the text to the upper right of the data point.) If the text item is linked to a data point, its position relative to the data point will be maintained, even if the data point is subsequently moved.
See also: Plot Windows